Finding holes in your hardwood floor can be a nightmare situation to find yourself in. But fear not! Regardless of their size, there are plenty of products available to help you repair these unsightly holes without the need to call out a professional.
With simple step-by-step instructions, we’ll be taking you through some of the most popular and successful ways that you can repair your hardwood floors.
No matter the level of your DIY skills, you’ll be able to master these specific techniques that will help you patch up your floor in no time at all.
Before you begin, there are a few things to consider such as which technique would best suit your flooring, the difference between wood putty and wood filler, and the different ways to paint your newly covered flooring.
So read on to discover the best ways to fix your hardwood flooring and how to prevent any holes from appearing in the future.
What Causes Holes InHardwood Flooring?
Whether you discover small or large holes in your flooring, you’re probably eager to know the reason behind them appearing to prevent it from reoccurring.
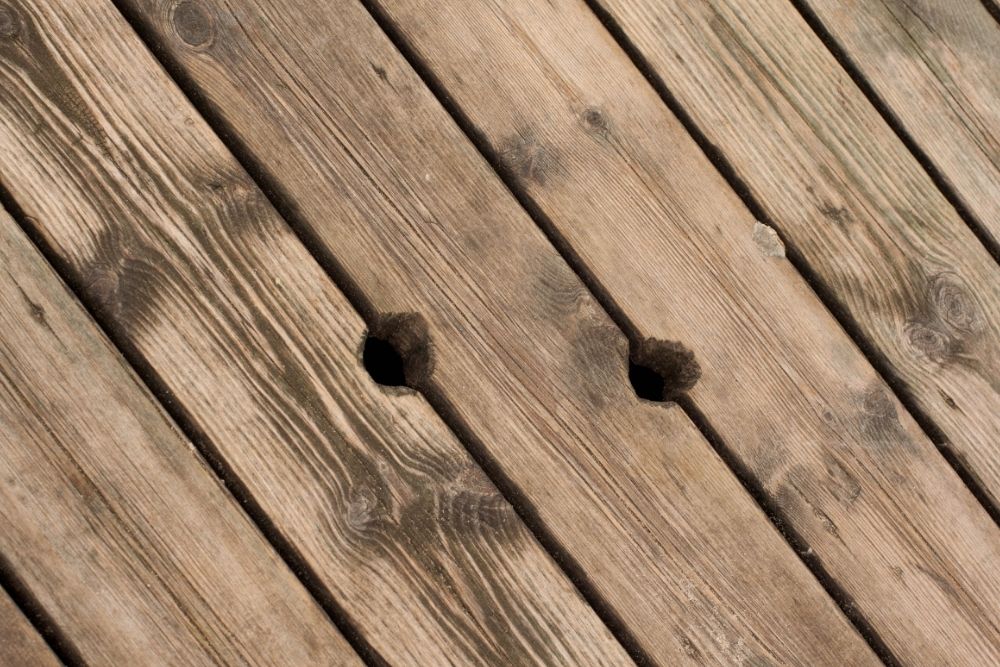
Larger holes generally appear when a large, heavy object is dropped on the floor and gauges out a piece of the wood. Smaller holes, however, are created by something a little more annoying – powderpost beetles.
The little intruders are one of the leading causes of small holes appearing in hardwood floors. Attracted to dead wood, these small beetles tend to lay their eggs while the wood is still in the lumber yard.
These eggs can take around 2-5 years to surface, thanks to a relatively slow growth stage, which means that homeowners don’t notice the holes until later on. But when they do, it’s time to do something about it!
How To Fix Holes InHardwood Flooring
Before you roll up your sleeves and don your overalls, you will need to decide which method of repair you would like to use on your flooring. The top 3 most common methods are:
Wood putty
Wood filler
Wood tape
Although they are often used interchangeably, wood filler and putty are not the same things.
The key differences between the two are that wood putty does not harden or stick to the surface that it is applied to. You’ll also find that you are unable to sand wood putty and typically it’s applied to wood once it has been stained and finished.
You’ll find that because of this, you will need to continually apply putty to the holes which isn’t a great long-term solution.
Unlike putty, wood filler bonds to the surface it is applied to and provides you with longer-lasting results. As it contains wood particles and fibers, you can also sand and stain wood filler once it has dried providing you with a better long-term solution.
Both wood filler and putty are available in several colors, so matching them to your existing flooring is relatively simple. Before purchasing either, make sure you read the label to check if the product is compatible with the wood you are applying it to.
Wood Putty
This method is generally used on smaller holes.
Equipment
Wood putty (color of your choice)
Putty Knife
Cloth
Method
Step 1: Clean the hole so it is free from dust and debris.
Step 2: Apply as much putty as you can to the hole. You ideally want to pack in more than you need to make sure the space is completely full and there are no air pockets.
Step 3: Using your putty knife, hold it at a 45-degree angle to the floor and scrape off any excess putty. The top of the putty should be level with the floor. Repeat this process if needed.
Step 4: Once your putty is level with the floor, wipe away any excess putty from the surrounding area with a cloth.
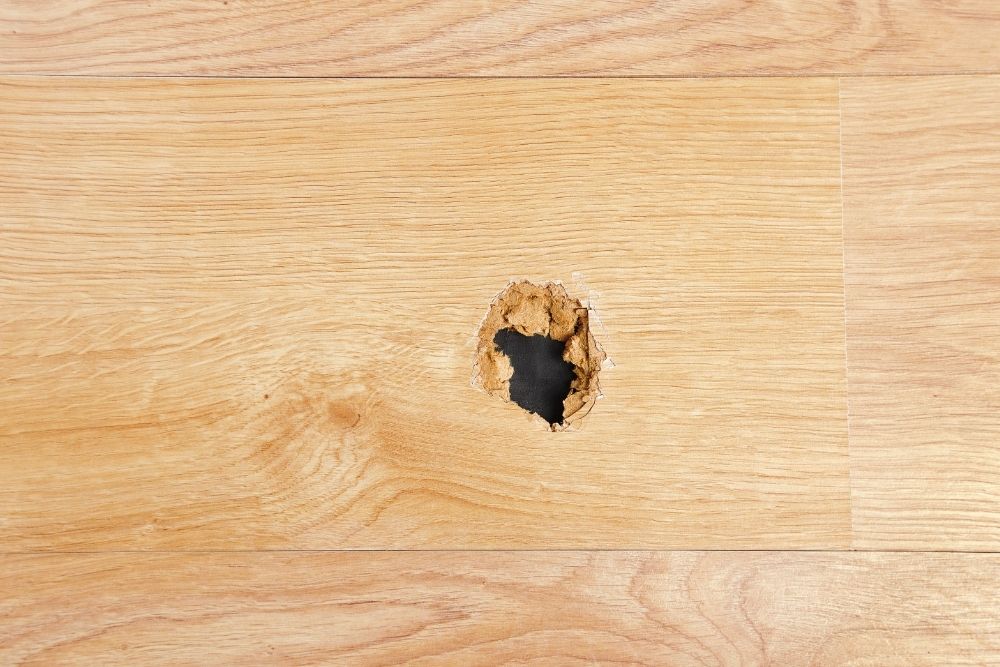
Wood Filler
This method is perfect for larger holes.
Equipment
Wood filler (color of your choice)
Sandpaper
Filler/putty knife
Damp cloth
Method
Step 1: Remove any large splinters/chips from around the hole and sand down the area.
Step 2: Using your damp cloth, remove any dust or debris from the area otherwise the filler won’t stick to the surface.
Step 3: Apply filler to the hole using the putty knife or directly from the tube. The filler tends to shrink as it dries so overfill the gap slightly.
Step 4: Once you have filled the hole, clean the surrounding area with your damp cloth.
Step 5: Wait for the filler to dry. This can vary depending on the product used. Drying times can range from 30 minutes-8 hours.
Wood Tape
This method is a great temporary fix and incredibly easy to do.
Equipment
Wood tape (color of your choice)
Measuring Tape (for large holes)
Scissors
Method
Step 1: If the hole is large, measure the size of it and add an extra centimeter to the result.
Step 2: Cut the correct size of wood tape to cover the hole.
Step 3: Apply the tape to the wood and firmly press around it.
Extra-Large Holes In Hardwood Floors
As wood filler and putty tend to not last too long, especially in busy areas, the best solution for fixing extra-large holes is to insert a piece of wood into the gap.
You can cut a small section of matching wood and place it in the gap using wood glue to keep it in place. Once the glue is dry, you can follow the same methods mentioned above to fill in any remaining gaps around the new piece with wood filler.
If you’re struggling to find a piece of wood to perfectly match your floor coloring, follow the same method but use a plain piece of wood instead. Once the filler has dried, sand the new piece of wood and use the same color paint to finish your piece. We promise no one will ever know!