If you are the kind of person who is constantly concerned about the security of your home, then chances are you own a Ring doorbell. Featuring state of the art technology, Ring doorbells work like security cameras, allowing you to see any intruders or thieves coming into contact with your house.
Controlled via the Ring doorbell app, these amazing devices can provide countless benefits to the modern homeowner, with the device even sending notifications when you are miles away.
However, this does not mean that Ring doorbells do not come with their negative setbacks, as they will not last forever and will one day need to be changed.
While removing your current Ring doorbell may seem like a simple task, there is a skill to the procedure that can help you remove it without error or issue. So if you want to know how you can remove your Ring doorbell, then you have come to the right place.
In the following article, we are going to teach you how to remove your Ring doorbell, by providing you with a step by step guide to the process. We have also gathered some important information concerning the removal procedure and how it can be done safely and easily.
So if you are ready to replace your Ring doorbell and need to remove your current model, here’s everything you need to get started…
Overview
If you are in a rush and don’t have time to read the entire article, then we have provided a basic rundown of the removal process in the following section:
Step one: turn off electricity
Step two: remove the faceplate
Step three: take out the battery (optional)
Step four: remove the doorbell
Step five: remove the wires
Now that you understand the basic components of the procedure, you can learn more about the removal process from our informative guide, which covers everything you need to know in more detail.
Ring Doorbell Models
These days, Ring doorbells can be purchased in one of two configurations: wired and wireless. Between these two categories, there are eight different doorbells available, with each sporting its own unique features and benefits.
If you want to remove your Ring doorbell, then you must first understand what model you are working with, as this can greatly alter the final procedure.
In the following sections, we have listed each of the doorbells available, so that you may determine which model you are using.
Wired Ring Doorbells
Ring doorbell wired
Ring doorbell pro
Ring doorbell pro 2
Ring doorbell elite
Wireless Ring Doorbells
Ring doorbell (2nd generation)
Ring doorbell 3
Ring doorbell 3 plus
Ring doorbell 4
Note: Wired doorbells are usually powered by the existing doorbell wiring found in your home, while the wireless models are powered by an internal battery. However, there are some battery-operated products that also come with the option of being hooked up to your house’s wiring.
How To Remove Ring Doorbell
While the removal process can vary depending on the model, the following steps can be applied to most products:
Step One: Turn Off Electricity
If your Ring doorbell has been connected to your house’s electrical system, then you will need to turn off the power in your home before beginning the removal process. This can be done by locating the main electrical panel and switching off the main breaker, which should stop any power from entering your home.
However, it is also possible to isolate the doorbell and switch off the power connected to it, as the device should have its own breaker labelled in the panel. If you are still unsure about how to turn off your electricity, then you will need to seek the advice of a qualified electrician.
Step Two: Remove The Faceplate
When you have turned off the main breaker, you can begin the removal process by taking off the faceplate cover, which refers to the hard outer shell that protects the inner workings of the doorbell.
While removing the faceplate is a relatively simple process, it is important to note that the wired and elite units will not need this procedure, as both models do not come with exterior covers.
In most cases, faceplate covers can be found on the bottom three-fourths of the doorbell, with the 2nd generation, pro and pro 2 models all displaying the same feature. The same can also be said for battery units such as the 2 and 4.
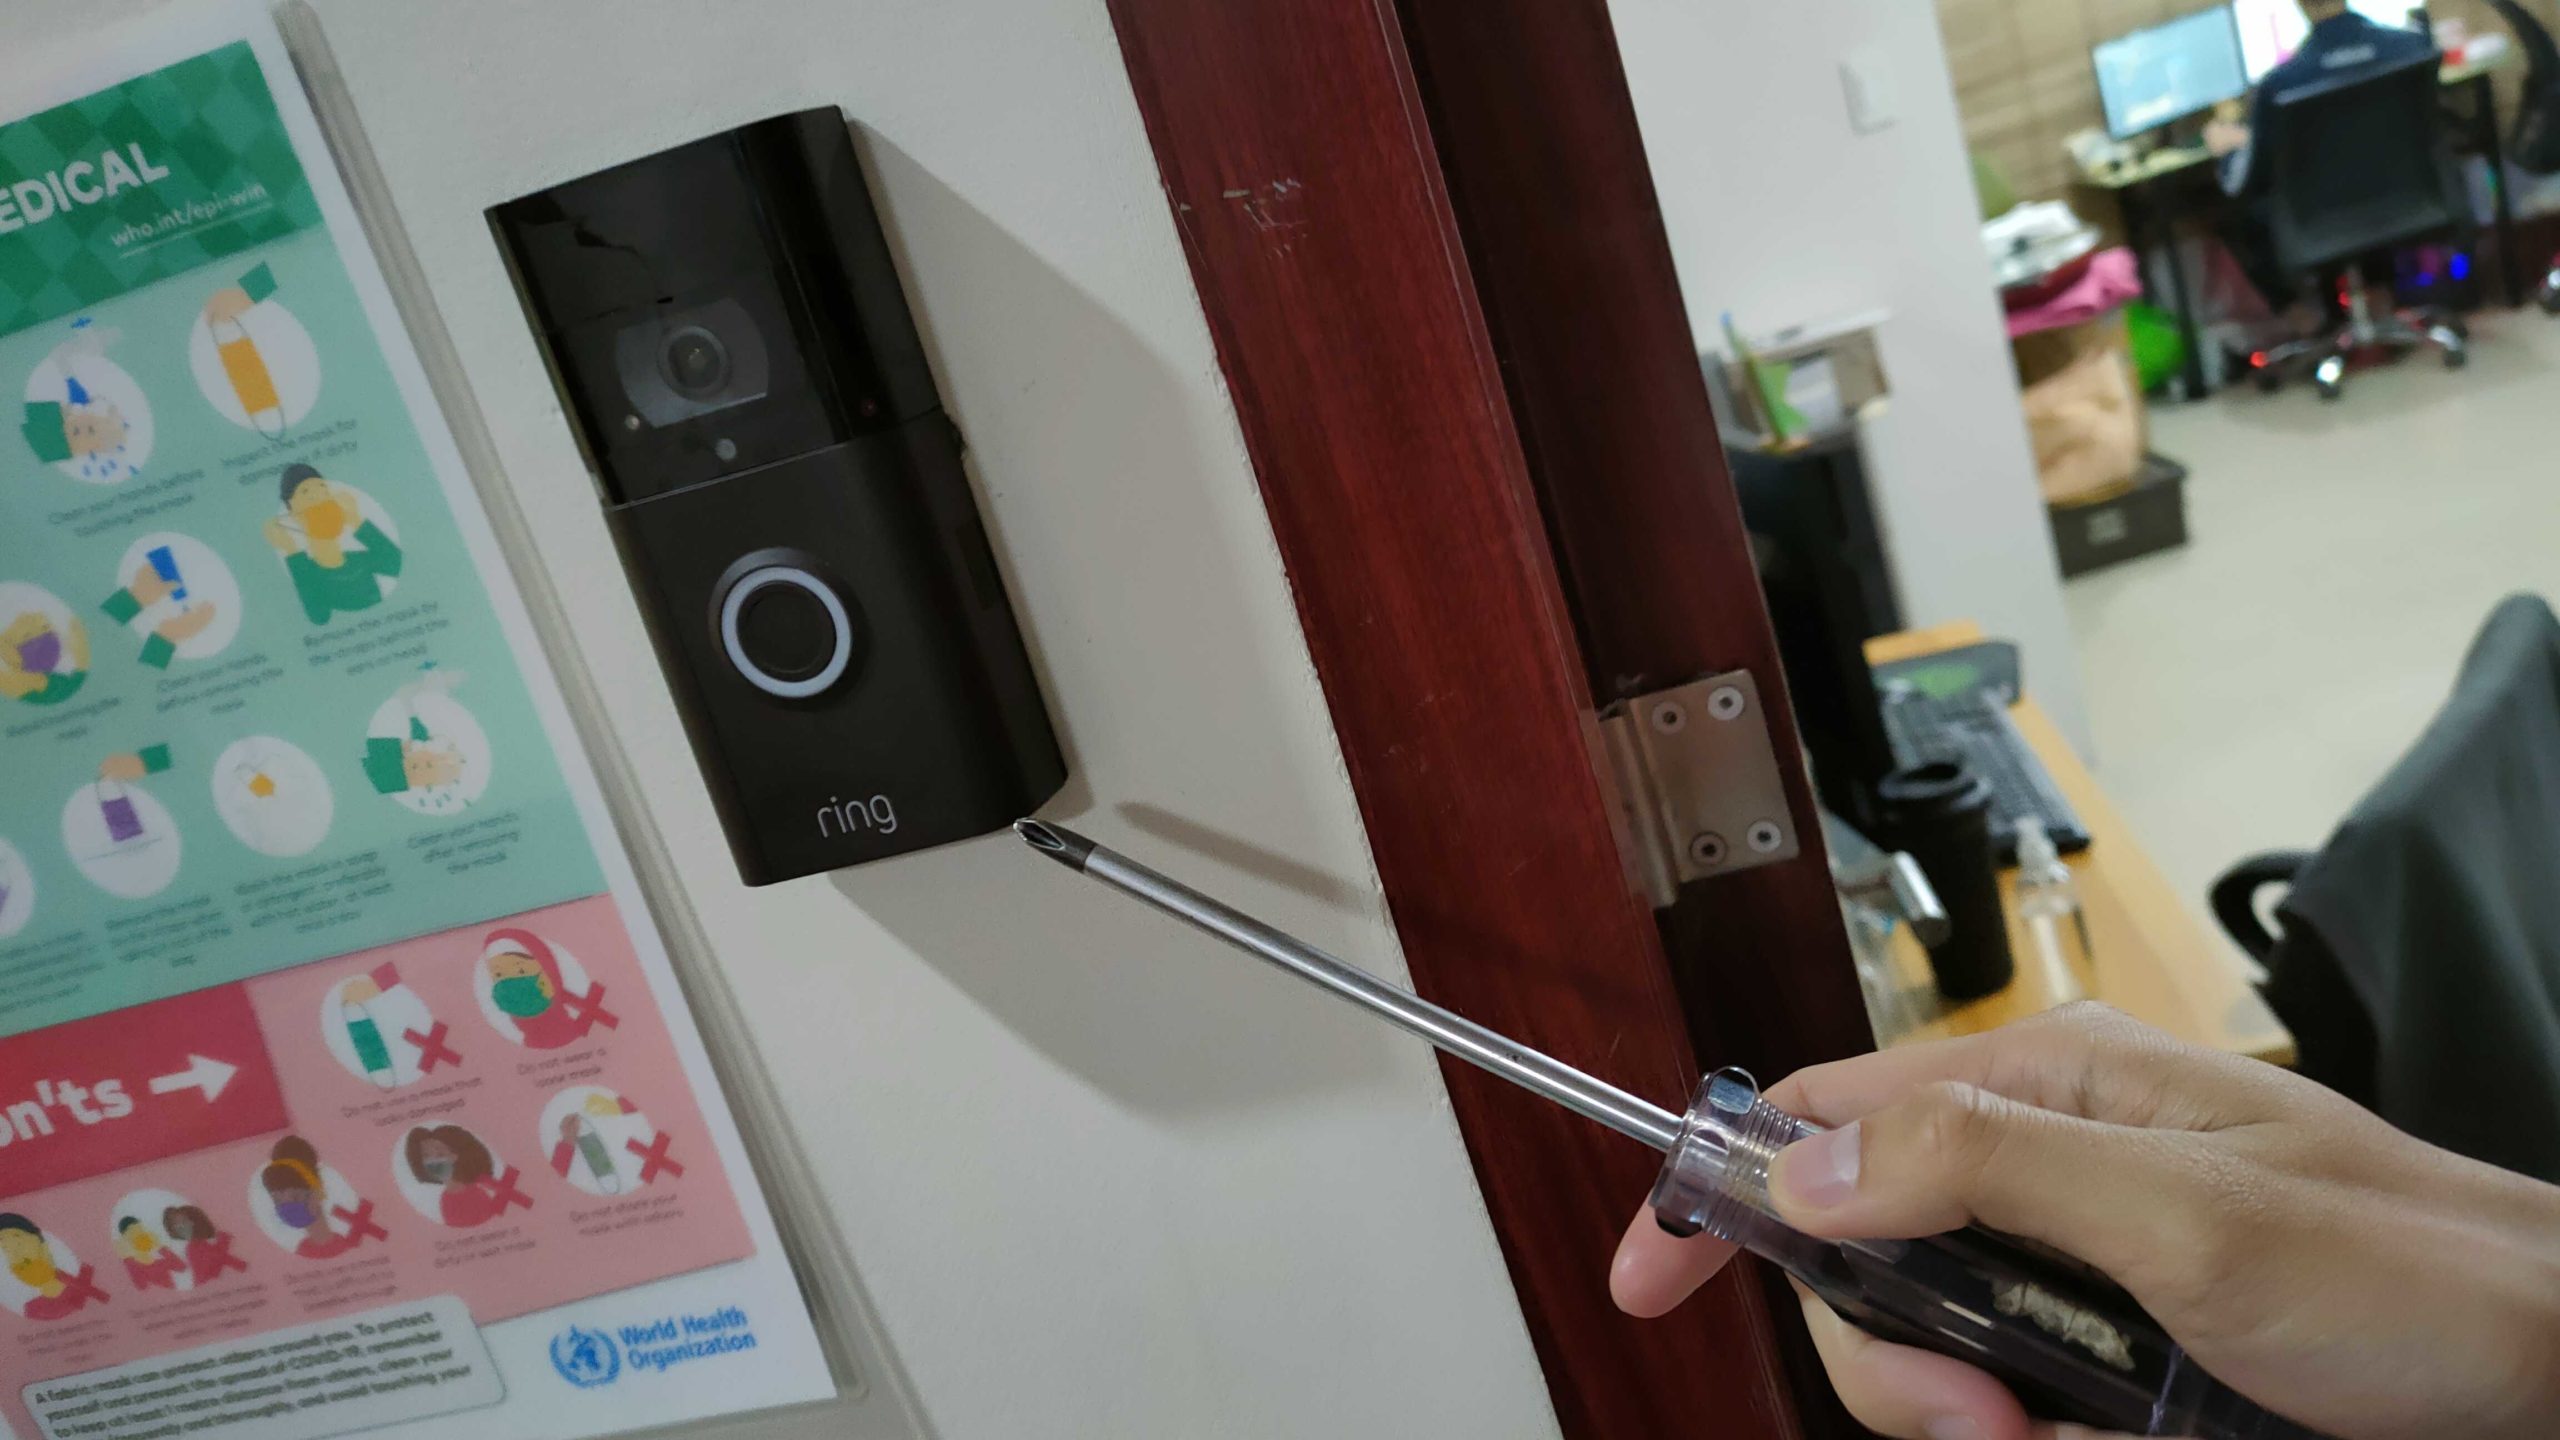
Faceplate covers will usually be secured to the doorbell by a single star-shaped screw, which can be found in the bottom corner of the unit.
How To Remove Faceplate Covers
When purchasing your Ring doorbell, you should have been given a special screwdriver for its removal, which commonly takes the form of a two-sided tool with an X-shaped head on one end and a star-shaped bit on the other. You will need this screwdriver to remove your faceplate.
Locate the main screw at the bottom of the base plate and unscrew it using the screwdriver. If you have lost your screwdriver, then you can use a T6 Torx bit or a power drill instead.
Remove the faceplate from the tabs by gently pulling on the bottom of the unit until it sits at a 45-degree angle.
How To Remove Wired Faceplates
Unlike wireless doorbells, wired models do not feature screws to secure the faceplate in place, which means they can be easily removed by using the plastic tabs that hold it to the wall.
You can do this by holding both sides of the model and gently pushing the middle of the unit until the faceplate has become detached. However, it is important not to apply too much force because this could cause serious damage.
Step Three: Remove The Battery (Optional)
While taking out your doorbell’s battery isn’t a necessary part of the removal process, it can be done if you think your doorbell’s power source is starting to run low.
Once the faceplate cover has been removed, all you have to do is locate the push tab at the bottom of the doorbell and press it, which should release the battery held inside.
Step Four: Remove The Ring Doorbell
In most cases, your Ring doorbell will be secured to your front door by 3 Phillips-head screws, with two screws on each side of the unit. You can remove these screws by using a Phillips head bit attached to your provided Ring screwdriver or by using your own power drill and tools.
How To Removed Models With Brackets
While most Ring doorbells will be secured to the wall by screws, the 2nd generation and elite models will usually be attached to the wall by mounting brackets, which can make them easier to remove. To remove these models, all you have to do is grip the bottom of the unit and pull it gently up until it reaches a 45-degree angle.
Once you have done this, you will need to unscrew the bracket from the 2nd generation model, which can be done right away or after you have removed the wires.
Step Five: Remove The Wires
When working with wired doorbells, most models will have two wires connected to the unit either through the bracket or the back of the doorbell itself. Regardless of which one you are removing, each wire will be connected to a single screw, which is sometimes referred to as a terminal screw.
This screw can usually be found on the front of the mounting brackets, while other models will have it on the back. All you have to do is locate the screw and slowly loosen it until the wires can be released. If you have yet to remove the screws mounting the bracket to the wall, then you can also do this at the same time.